Authorization
Voxtelesys REST API endpoints require authorization — the only exceptions are the Auth API's public discovery and JWKS endpoints. Voxtelesys supports two authorization methods:
- OAuth 2.0 (recommended) — short-lived access tokens scoped to specific APIs, issued either by Voxtelesys or by your own identity provider (e.g., Microsoft Entra ID).
- API Key — a long-lived personal key generated in the Voxtelesys Portal.
Whichever method you choose, the client sends the token in the Authorization header when making requests to protected resources:
Authorization: Bearer <token>
All requests must be made over HTTPS. Unencrypted HTTP is not supported.
OAuth 2.0
OAuth 2.0 is the preferred way to authorize requests to Voxtelesys APIs. Compared to API keys, OAuth 2.0 offers:
- Short-lived tokens — access tokens expire automatically (default lifetime of 1 hour), limiting exposure if a token is leaked.
- Scoped access — each client is granted only the API scopes it needs (e.g., view messaging vs. manage messaging).
- Credential rotation — client secrets can be rotated or given expiration dates without affecting other integrations.
- Federation — you can bring your own identity provider, such as Microsoft Entra ID, so your organization's existing security policies apply.
OAuth 2.0 setup is managed in the Voxtelesys Portal. You can either use Voxtelesys as your identity provider or register your own.
Using Voxtelesys as your Identity Provider
1. Create a Client
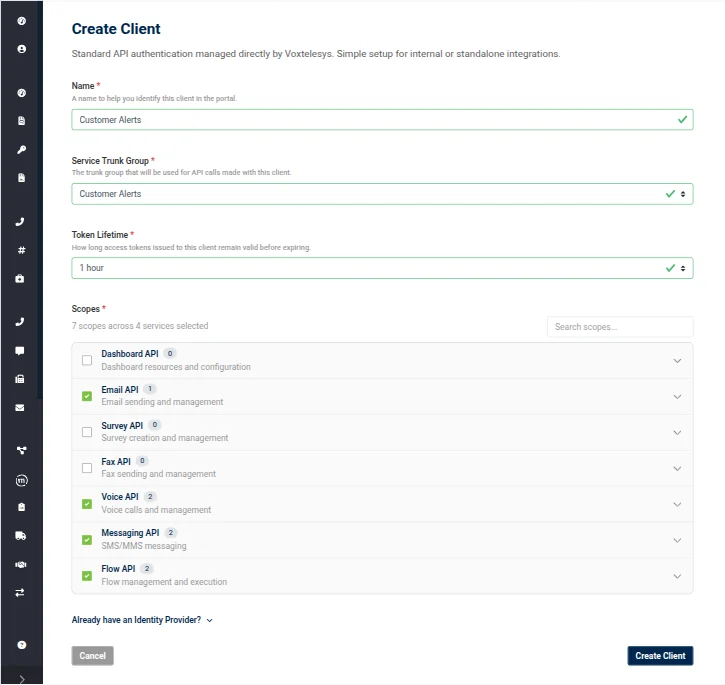
In the portal, click Create Client. Give the client a name, select the service trunk group it will use, choose a token lifetime, and select the API scopes the client needs.
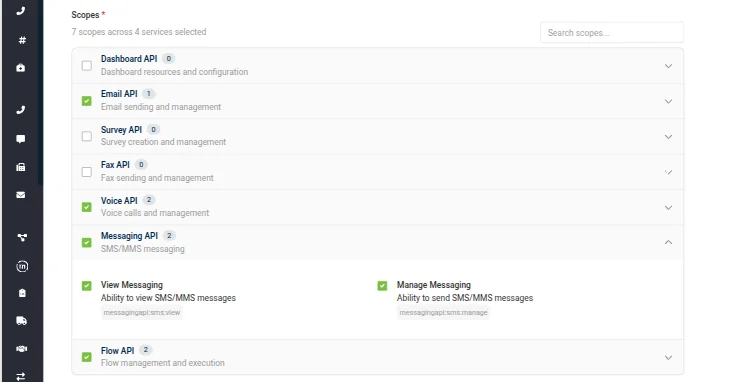
Scopes control exactly what a client can do. Expand a service to select individual permissions — for example, granting View Messaging without Manage Messaging.
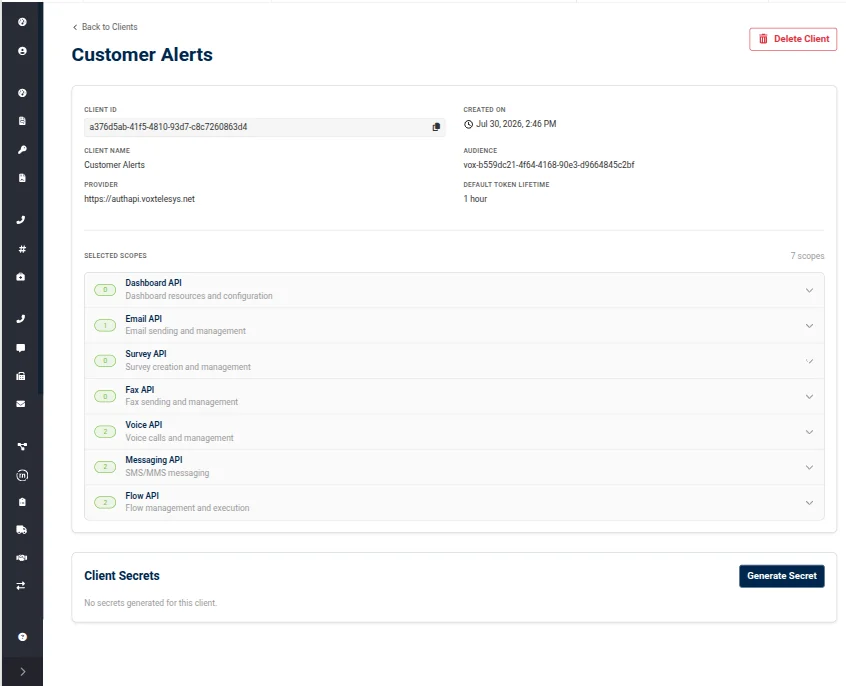
After creation, the client's detail page shows its Client ID, audience, provider, token lifetime, and selected scopes.
2. Generate a Client Secret
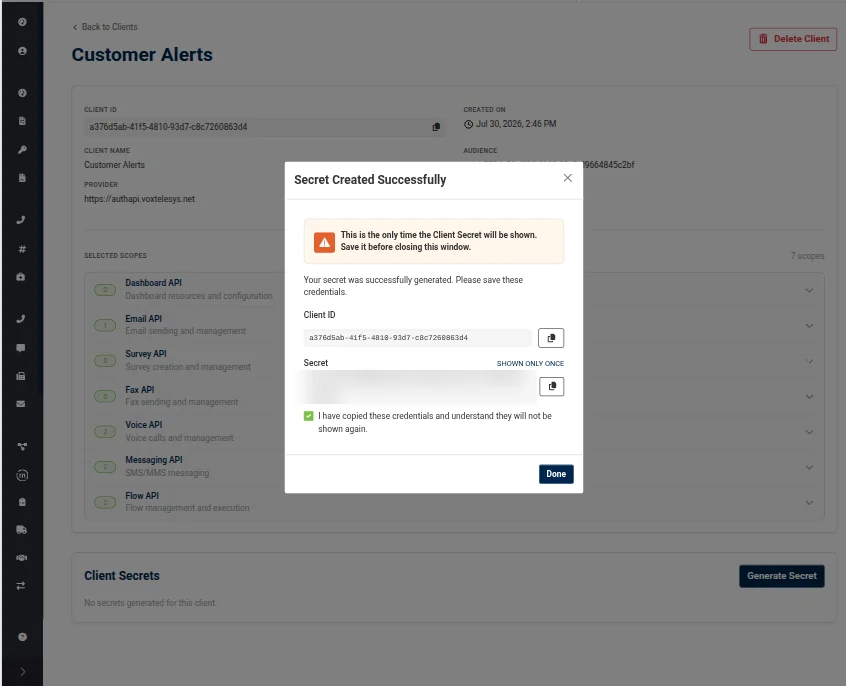
From the client's detail page, click Generate Secret. You can optionally name the secret and set an expiration date.
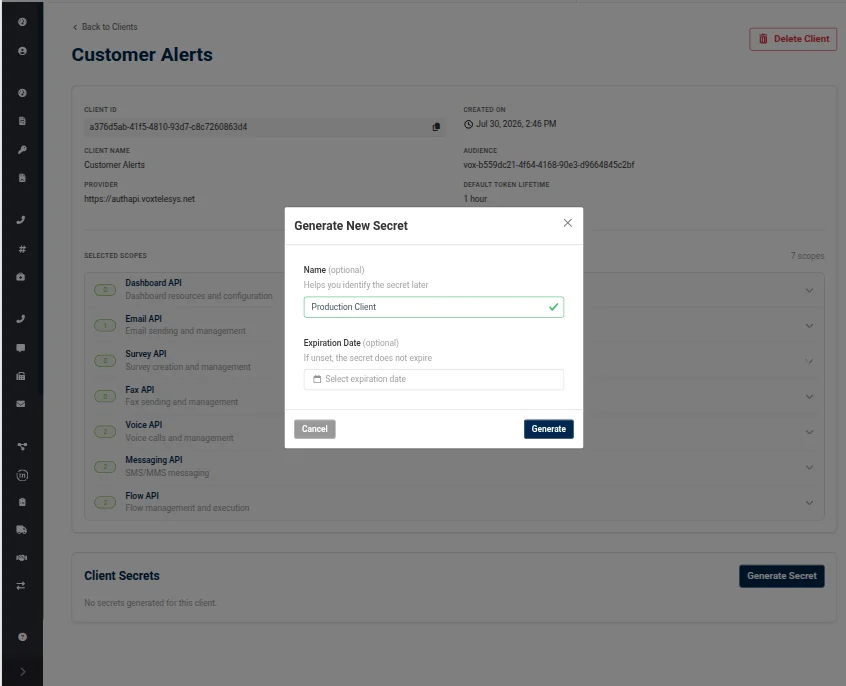
The client secret is shown only once. Copy and store it securely before closing the dialog — if it is lost, you must generate a new secret.
3. Request an Access Token
Request an access token from the Auth API using the client_credentials grant. Authenticate with HTTP Basic authentication (client_secret_basic), passing your client_id as the username and your client_secret as the password:
curl -X POST https://authapi.voxtelesys.net/api/v1/oauth/token \
  -u "<client_id>:<client_secret>" \
  -d "grant_type=client_credentials"
The response contains a JWT access token and its lifetime in seconds:
{
  "access_token": "<token>",
  "token_type": "Bearer",
  "expires_in": 3600
}
Include this token in the Authorization header of requests to Voxtelesys APIs. When the token expires, request a new one from the Create Token endpoint.
Bringing your own Identity Provider
If your organization already uses an OpenID Connect (OIDC) compliant identity provider, such as Microsoft Entra ID, you can federate it with Voxtelesys instead of managing separate credentials.
In the portal, click Register Identity Provider and enter your provider's Discovery URL (usually ending in /.well-known/openid-configuration). The issuer and JWKS URI are auto-filled from the discovery document, and the signing keys are verified automatically.
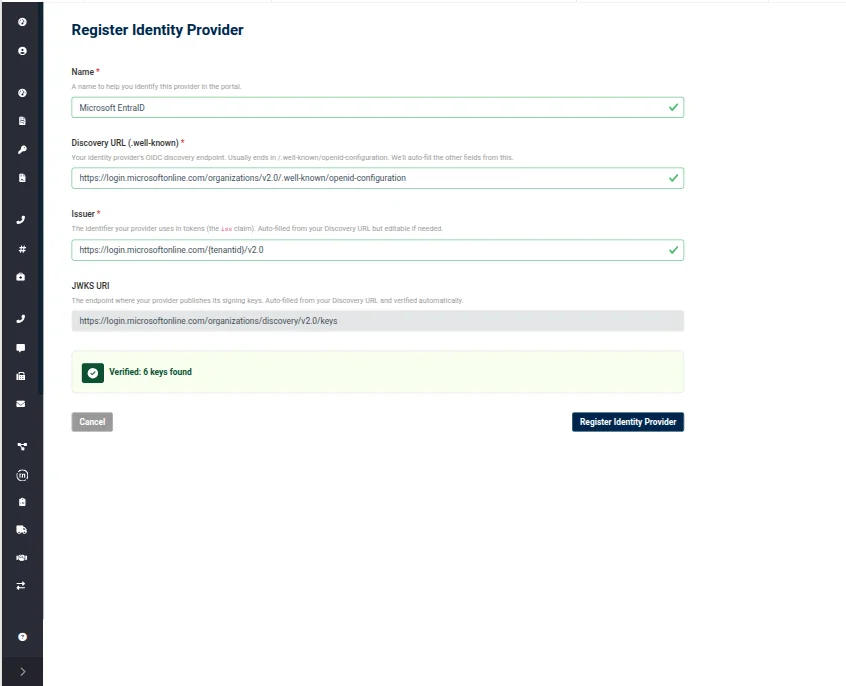
Once registered, the provider's details are shown in the portal, and you can create clients under it using Create Client.
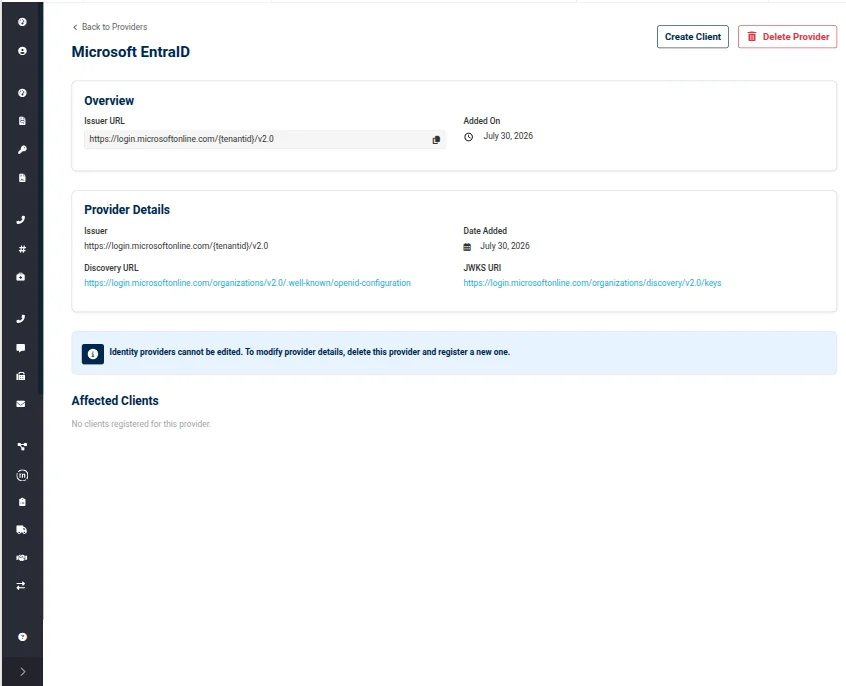
Tokens issued by your identity provider for these clients are then accepted by Voxtelesys APIs, verified against your provider's published signing keys.
Identity providers cannot be edited after registration. To modify provider details, delete the provider and register a new one.
API Key
API keys are long-lived personal keys that give access to Voxtelesys' RESTful APIs and services. The key is sent using the bearer HTTP authentication scheme (RFC 6750) — include it in the Authorization header exactly like an OAuth 2.0 access token.
API keys are managed on the API Keys page of the Voxtelesys Portal.
1. Create an API Key
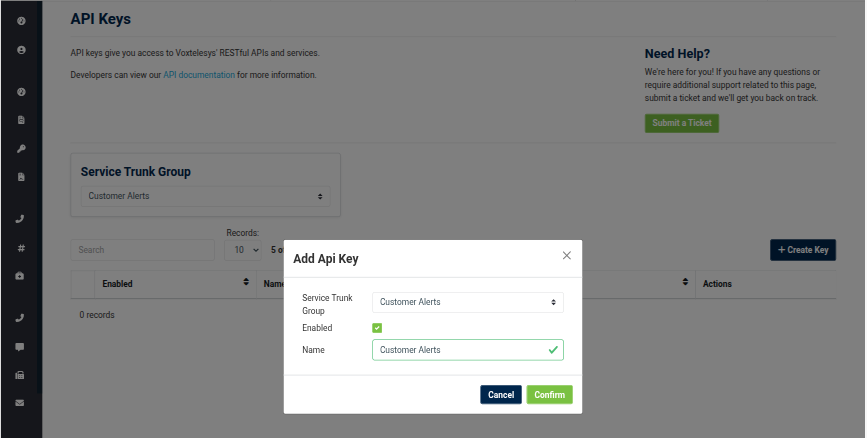
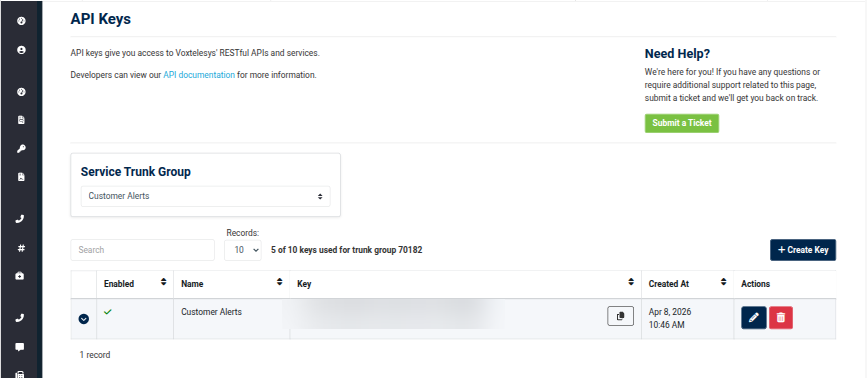
Select the service trunk group the key will belong to, then click Create Key. Give the key a name, make sure Enabled is checked, and click Confirm.
2. Copy your Key
The new key appears in the list for the selected service trunk group. Use the copy button in the Key column to copy it. Keys can be renamed, disabled, or deleted at any time from the Actions column.
3. Restrict Access with an ACL (Optional)
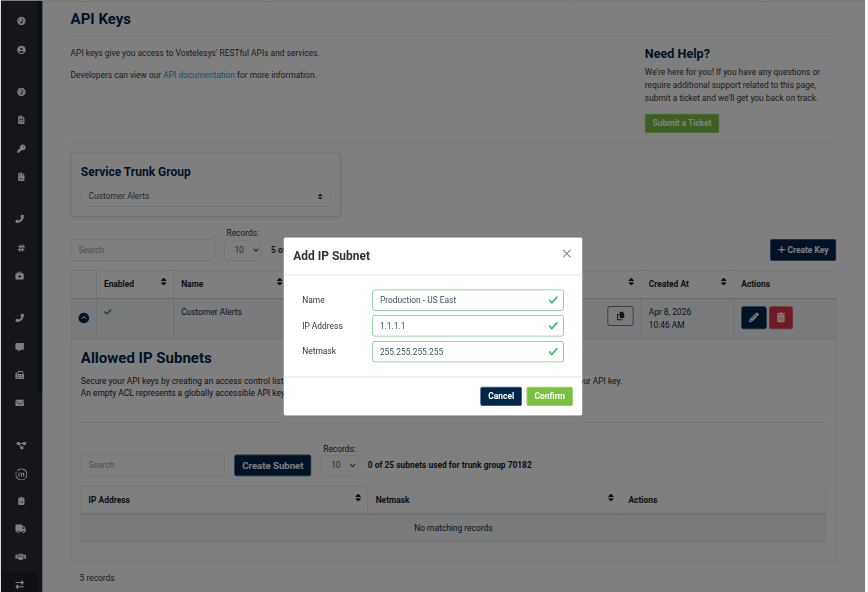
Secure your API key by creating an access control list (ACL). Only IP subnets included in the ACL are granted permission to use the key; an empty ACL represents a globally accessible key, commonly used for hosted applications or other off-net solutions.
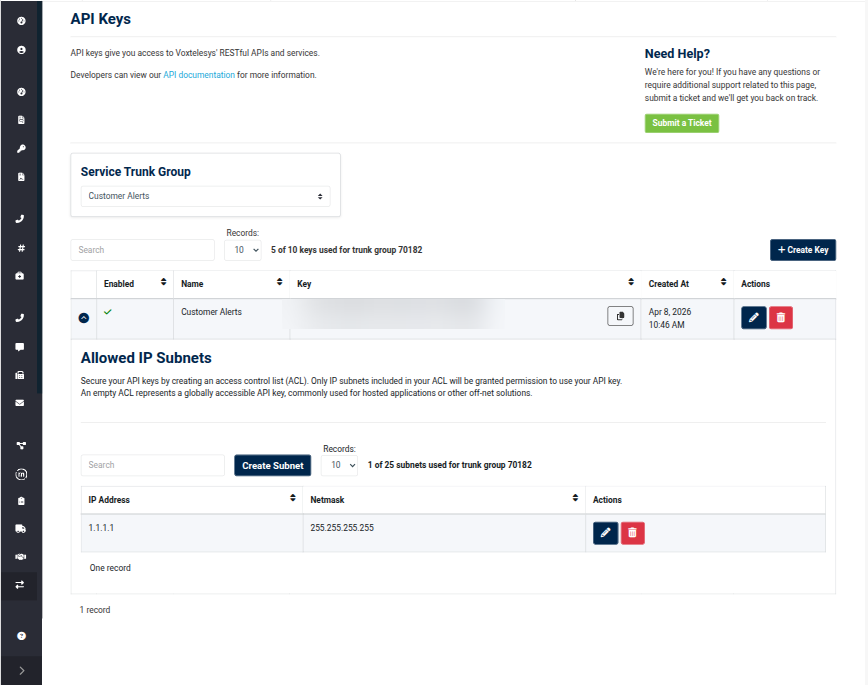
Expand the key's row to show its Allowed IP Subnets, then click Create Subnet. Give the subnet a name and enter its IP address and netmask, then click Confirm.
The subnet appears in the key's ACL, and requests using the key are now accepted only from the listed subnets.
API keys are long-lived and grant broad access to your account. For production integrations, we recommend OAuth 2.0 instead, which provides short-lived, scoped tokens.