Hosted Signing
Hosted Signing lets you sign outbound calls with your own STIR/SHAKEN certificate, without building or running signing infrastructure. You upload your certificate and private key, and choose the attestation level for your calls. Voxtelesys then applies your signature to each call as it leaves our network.
Why Hosted Signing
The FCC's Eighth Report and Order on third-party authentication (FCC 24-120) took effect on September 18, 2025. It changed how providers with a STIR/SHAKEN implementation obligation can rely on an upstream provider to sign their calls. These providers must:
- Register with the STI Policy Administrator (STI-PA) and get their own SPC token
- Use that token to get their own certificate from an approved STI Certificate Authority (STI-CA)
- Sign their calls with that certificate, and independently decide the attestation level for each call
Signing under an upstream carrier's certificate, or letting the carrier choose the attestation, no longer satisfies these rules. A third party can still do the technical work of signing, as long as it uses the provider's certificate and follows the provider's attestation decisions.
Hosted Signing is built for this arrangement:
| Benefit | Description |
|---|---|
| Your certificate | Calls are signed with the certificate issued to your SPC, not the Voxtelesys certificate |
| Your attestation decisions | You set the attestation level for each trunk group in a policy, and can override it per call |
| No infrastructure to run | No signing servers or key management to operate. Voxtelesys signs each call as it leaves our network |
| Built-in fallback | If your certificate can't be used, calls are still signed at C attestation instead of going out unsigned |
| Visibility | Every call's signing details appear in your CDRs |
Do I Need Hosted Signing?
- You need it if you are a voice service provider, such as a reseller or a provider whose customers originate calls, and you have a STIR/SHAKEN implementation obligation. This usually applies if you've certified to partial or full STIR/SHAKEN implementation in the Robocall Mitigation Database.
- You don't need it if you are an end user placing calls for your own business. Voxtelesys signs those calls automatically with its own certificate, as described in Outbound Attestation.
This page is a summary, not legal advice. If you aren't sure whether these rules apply to you, talk to your regulatory counsel.
Getting Started
Hosted Signing is managed in the Voxtelesys Portal under Channels > Voice > Hosted Signing. It has two parts:
| Component | Description |
|---|---|
| Certificates | Your STIR/SHAKEN certificate and private key, issued by an approved STI-CA |
| Policies | Assign a certificate to one or more outbound trunk groups and set the attestation to use for their calls |
Before You Begin
Complete these steps before you upload a certificate:
- Meet the regulatory prerequisites. These include an Operating Company Number (OCN), a current FCC Form 499-A filing, and a filing in the Robocall Mitigation Database.
- Register with the STI-PA. Registration gives you a Service Provider Code (SPC) and the SPC token you need to request a certificate.
- Get a certificate from an approved STI Certificate Authority (STI-CA). The certificate must use an EC P-256 key. The private key must be unencrypted and PEM-encoded.
- Register your SPC with Voxtelesys. Contact support to add your SPC to your account. Every certificate you upload must contain an SPC that is registered to your account.
Certificates
The Certificates table lists every certificate on your account.
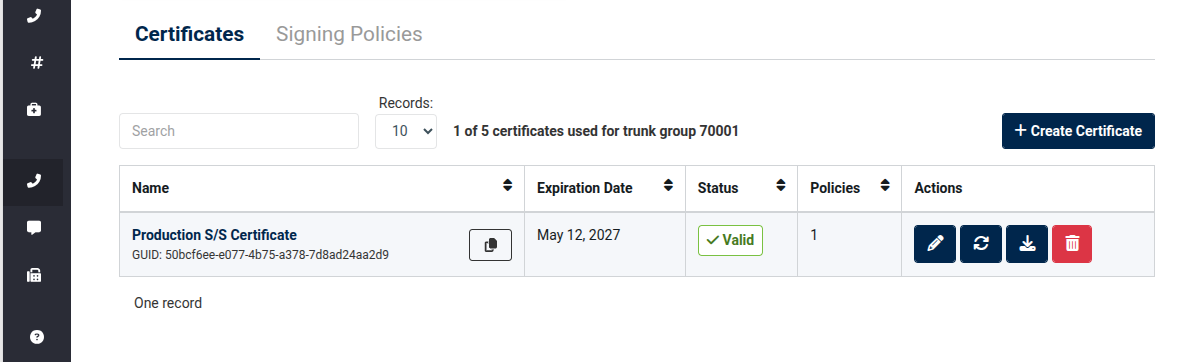
1. Create a Certificate
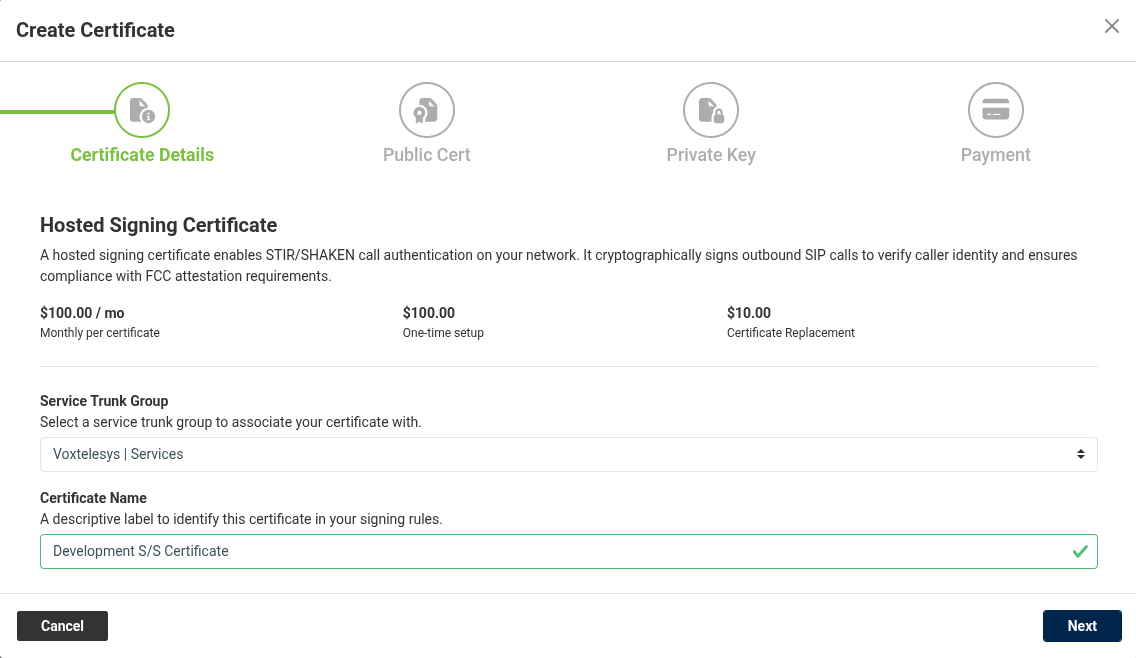
Click Create Certificate to open the certificate wizard. On the Certificate Details step, choose the Service Trunk Group the certificate belongs to and give it a Certificate Name. The name identifies the certificate when you create policies.
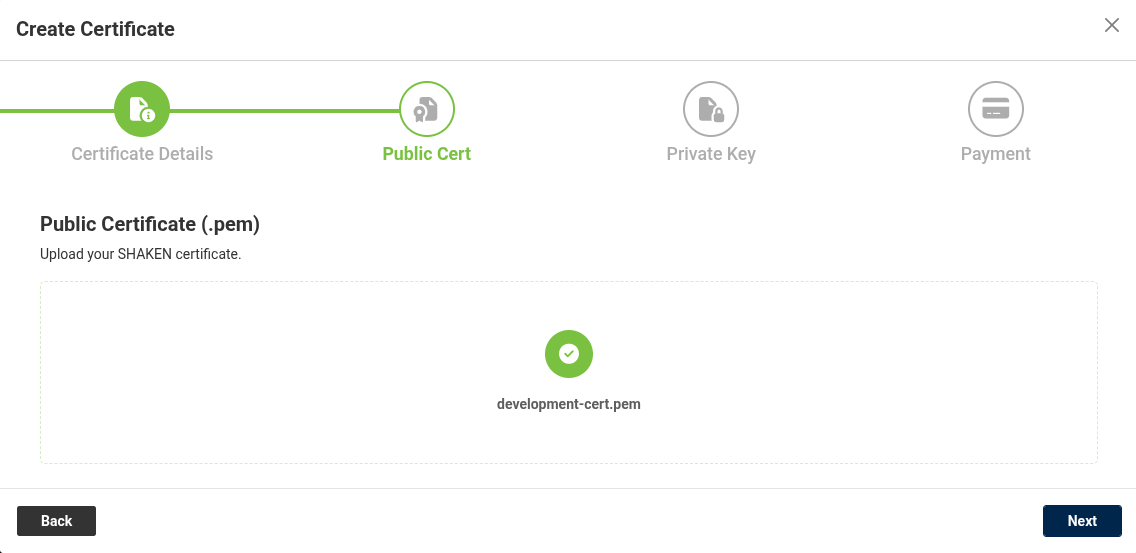
On the Public Cert step, upload your certificate (.pem). It is validated before you can continue.
On the Private Key step, upload the private key (.pem) that matches the certificate. It is also validated before you can continue.
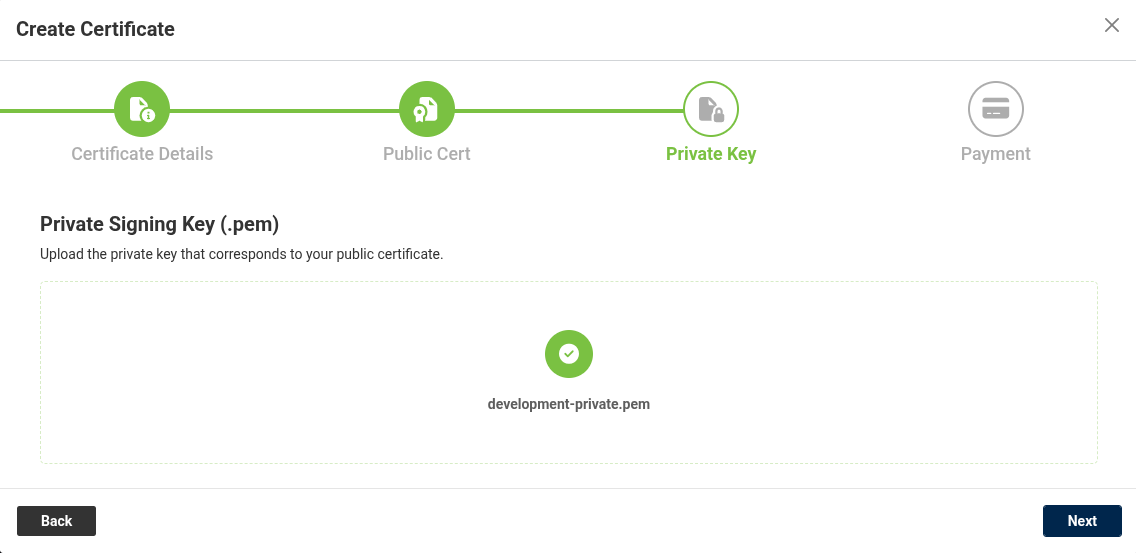
If either file fails validation, the wizard shows the error and how to fix it. See Certificate Validation Errors for every error and its fix.
Last, on the Payment step, review the charges. You can pay now or have them added to your next monthly invoice.
Each certificate has a one-time setup charge and a recurring monthly charge. No prorated monthly fee is charged when the certificate is created.
2. Replace a Certificate
Certificates expire, so you need to renew yours before its expiration date. To renew, upload the new certificate and its private key to the same row in the Certificates table. You don't need to delete the old certificate or create a new one, and the policies that use it stay the same. A replacement charge applies.
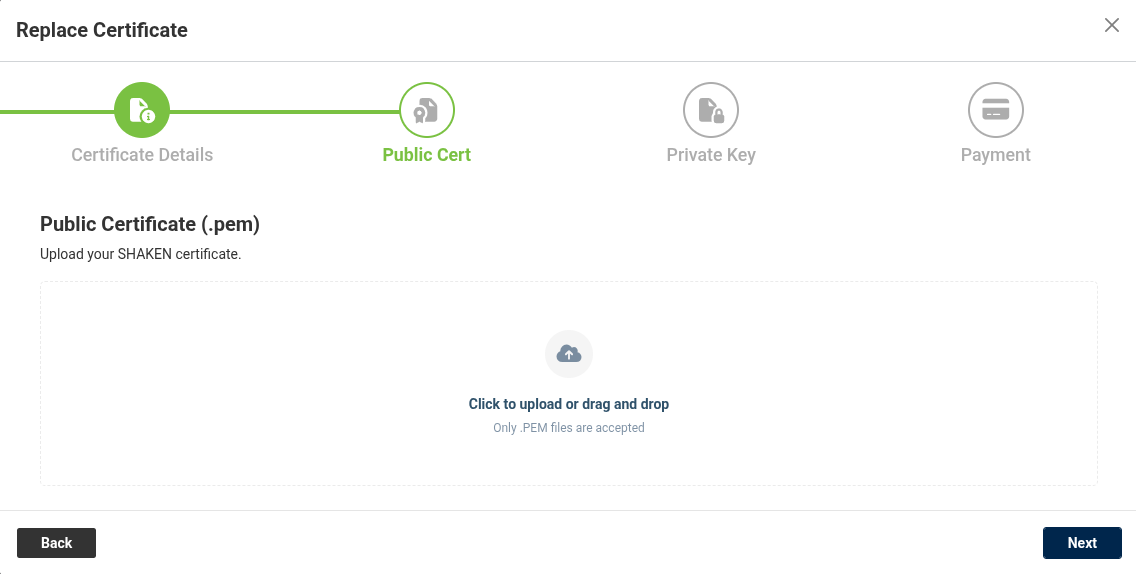
Replace your certificate well before it expires, and check the Expiration Date column in the Certificates table regularly. Once it expires, calls on trunk groups that use it fall back to the Voxtelesys certificate at C attestation. Those calls are no longer signed with your certificate.
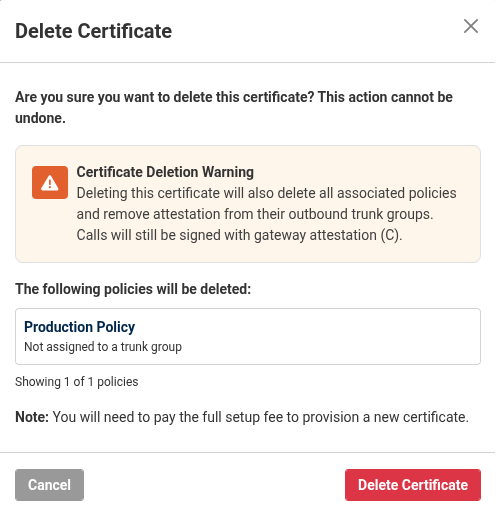
3. Delete a Certificate
Deleting a certificate can't be undone. It also deletes every policy that uses it and removes those policies from their outbound trunk groups. Calls on those trunk groups are then signed with the Voxtelesys certificate at gateway attestation (C). Adding a certificate later is charged the full setup fee again. To renew a certificate, replace it instead.
Policies
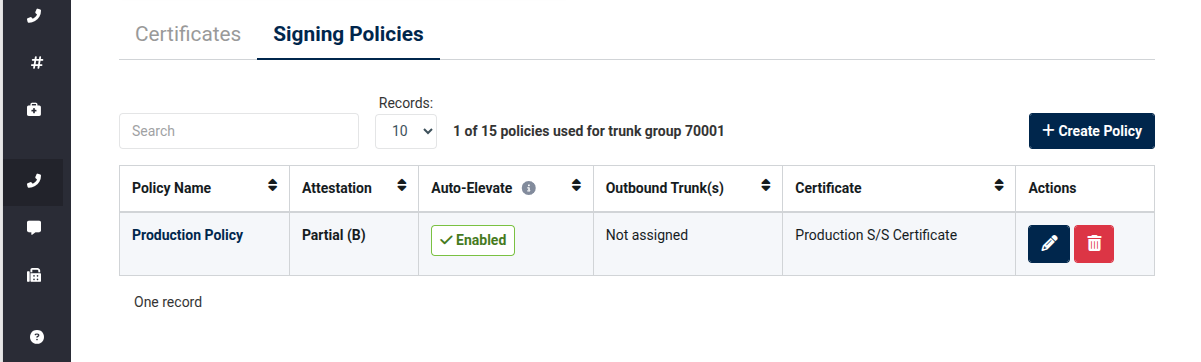
A certificate isn't used for signing until it is assigned to a policy. A policy links one certificate to one or more outbound trunk groups and sets the attestation level for their calls. Policies are listed on the Signing Policies tab and have no charge.
1. Create a Policy
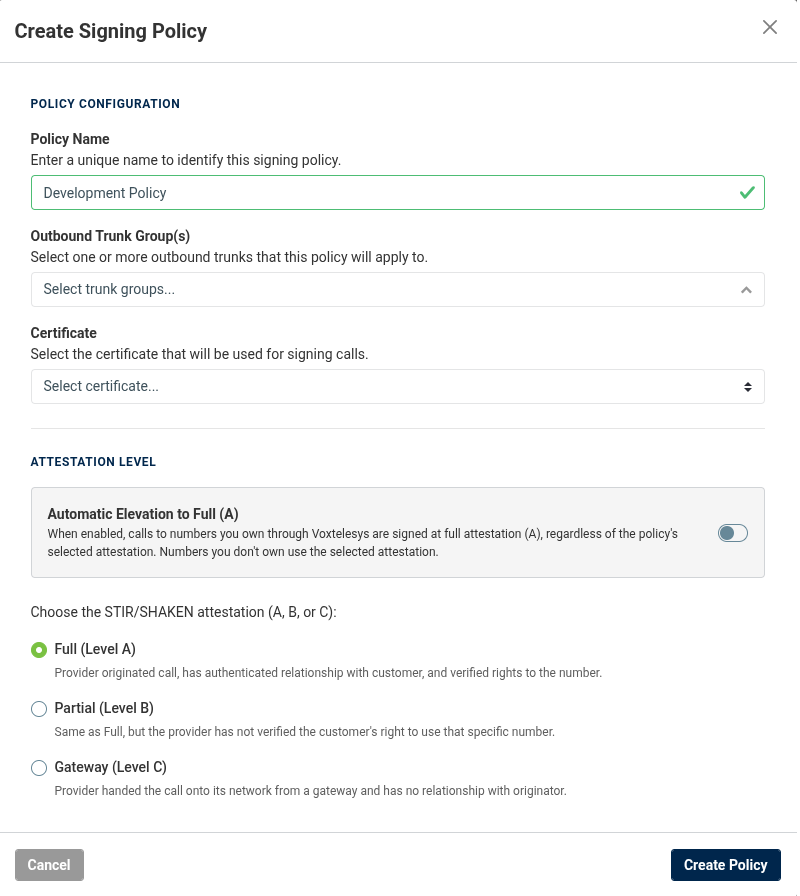
Click Create Policy and fill in:
- Policy Name: a unique name for the policy
- Outbound Trunk Group(s): the trunk groups whose calls will be signed with your certificate
- Certificate: the certificate to sign with
- Automatic Elevation to Full (A): when on, calls from numbers you own through Voxtelesys are signed at Full (A), whatever the policy's selected attestation
- Attestation Level: the attestation for all other calls: Full (A), Partial (B), or Gateway (C)
With Hosted Signing, you decide the attestation level for your calls. Voxtelesys only applies your signature, and doesn't check whether the level you chose is appropriate. Make sure your policy meets the SHAKEN attestation criteria described in Outbound Attestation.
2. How Policies Are Applied
- Signing: Once a policy is assigned to an outbound trunk group, every call on that trunk group is signed with your certificate.
- Elevation enabled: If the calling number is owned by your account, the call is signed at A. Calls from all other numbers use the policy's attestation level.
- Elevation disabled: Every call is signed at the policy's attestation level.
- Per-call override: You can set the attestation for a single call with the
P-Attestation-IndicatorSIP header.
Fallback Signing
If your certificate can't be used, for example because it has expired, calls on trunk groups with a policy assigned are still signed, using the Voxtelesys certificate at gateway attestation (C). These calls show Fallback in your CDRs.
Branded calling and Hosted Signing can't be used together right now. Calls on a trunk group with a policy assigned are not branded.
3. Delete a Policy
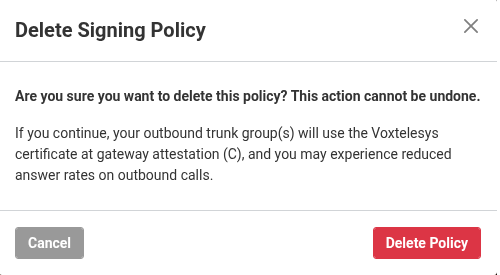
Deleting a policy can't be undone, and it removes the policy from every outbound trunk group that uses it. Calls on those trunk groups are then signed with the Voxtelesys certificate at gateway attestation (C), which can lower answer rates.
Verify Signing
To confirm your certificate is being used:
- Place a test call through an outbound trunk group that has a policy assigned.
- In the Portal, find the call in CDRs.
- In the STIR/SHAKEN column, check that:
- Hosted is
Yes - Certificate shows your certificate's ID
- Attestation is the level you expect
- Fallback is
No
- Hosted is
- If Fallback is
Yes, make sure your certificate hasn't expired and the trunk group's policy points to the correct certificate.
CDR Fields
The STIR/SHAKEN column in the CDRs table includes these fields:
| Field | Description |
|---|---|
| Attestation | The attestation level the call was signed with |
| Hosted | Whether the call was signed with a hosted certificate |
| Certificate | The ID (GUID) of the hosted certificate, if one was used |
| Branded | Whether the call was branded |
| X5U | The X5U certificate URL used in the call's PASSporT |
| Fallback | Whether the call was signed with the Voxtelesys certificate at C attestation because the hosted certificate couldn't be used |
The same fields are included in reports you generate in the Portal.
Security
- Your private key is encrypted before it is stored and is only used to sign your calls.
- Your certificate signs only the calls on trunk groups where you've assigned it to a policy.
- Upload private keys only through the Portal. Never send a private key by email or in a support ticket.
Certificate Validation Errors
Both files are validated when you upload them. If validation fails, find the error below. Each entry gives a recommended fix and an openssl command you can use to check your file.
FILE_TOO_LARGE
File Too Large: The file exceeds the 64 kB limit.
Fix: Make sure you are uploading the correct file, a PEM-encoded certificate or key.
ls -lh cert.pem
MALFORMED_CERTIFICATE
Malformed: The certificate file is malformed or can't be parsed.
Fix: Make sure the file is a valid PEM-encoded X.509 certificate. Copy and paste often corrupts certificates by breaking line endings or dropping the footer.
openssl x509 -in cert.pem -text -noout
CERTIFICATE_NOT_YET_VALID
Not Yet Valid: The certificate isn't valid until <not_before_date>.
Fix: Upload a certificate that is valid now. If this certificate is meant for later, wait until <not_before_date>.
openssl x509 -in cert.pem -noout -dates
CERTIFICATE_EXPIRED
Expired: The certificate expired on <expiration_date> and can't be used to sign calls.
Fix: Get a renewed certificate from your STI-CA, then upload it with its new matching private key.
openssl x509 -in cert.pem -noout -dates
INCORRECT_KEY_ALGORITHM
Incorrect Key Algorithm: STIR/SHAKEN requires the certificate's own key to be EC P-256. This certificate's key is <actual_key>.
Fix: The most common cause is an RSA key. The Signature Algorithm field in openssl output shows the algorithm the CA used to sign the certificate. It isn't the certificate's own key type, and this check doesn't use it. Generate a compliant key and request the certificate again:
openssl genpkey -algorithm EC -pkeyopt ec_paramgen_curve:P-256 -out private.pem
To check the key type:
openssl x509 -in cert.pem -noout -text | grep -E "Public Key Algorithm|Public-Key|NIST CURVE"
MISSING_TN_AUTH_LIST
Missing TNAuthList: The certificate doesn't have the required TNAuthList extension (OID 1.3.6.1.5.5.7.1.26).
Fix: Request a STIR/SHAKEN certificate from an approved STI-CA, using an SPC token from the STI-PA.
openssl x509 -in cert.pem -noout -text | grep -A3 "1.3.6.1.5.5.7.1.26"
MISSING_SHAKEN_POLICY
Missing SHAKEN Policy: The certificate doesn't assert a SHAKEN certificate policy.
Fix: This usually means the CA issued the certificate under the wrong profile. Ask your CA to reissue it under the SHAKEN policy.
openssl x509 -in cert.pem -noout -text | grep -A2 "Policies"
NO_CHAIN_OF_TRUST
No Chain of Trust: The certificate's issuer isn't a trusted STI-CA, or the chain is incomplete.
Fix: Make sure the issuer is on the STI-PA's list of approved STI-CAs. Self-signed certificates and certificates from internal PKI always fail. If the issuer is approved, download the current chain from your CA's portal and upload the full chain.
openssl x509 -in cert.pem -noout -issuer
SPC_SUBJECT_MISMATCH
SPC Mismatch: The SPC in this certificate (<cert_spc>) isn't registered to your account.
Fix: Confirm the SPC is registered to your organization. If it is, open a support ticket to have it added to your account. If it belongs to a different provider, request a new certificate with an SPC assigned to your account. The FCC requires each provider to sign calls with its own certificate.
openssl x509 -in cert.pem -noout -subject
DUPLICATE_CERTIFICATE
Duplicate: This certificate is already on your account.
Fix: Use the existing certificate, or upload a different one.
openssl x509 -in cert.pem -noout -fingerprint -sha256
PRIVATE_KEY_MISMATCH
Key Mismatch: The private key doesn't match the uploaded certificate.
Fix: Upload the private key that was generated with the CSR for this certificate.
openssl x509 -noout -pubkey -in cert.pem > cert_pub.pem && \
openssl pkey -pubout -in private.pem > key_pub.pem && \
diff cert_pub.pem key_pub.pem
UNSUPPORTED_KEY_FORMAT
Unsupported Key Format: The private key isn't in a supported format.
Fix: The file must be an unencrypted, PEM-encoded EC private key that starts with -----BEGIN PRIVATE KEY-----. Convert it based on its current format:
# Passphrase-protected key
openssl pkey -in enc.pem -out private.pem

# DER-encoded key
openssl pkey -inform DER -in key.der -out private.pem

# PKCS#12 / .pfx bundle
openssl pkcs12 -in bundle.pfx -nocerts -nodes -out private.pem
To check the converted key:
openssl pkey -in private.pem -noout -text